 Creating a three-dimensional layout with a pronounced sense of depth
From an optical point of view, aquaria are just a limited space with clear borders. However, there are many tricks how you can make an aquarium look as if it contained an endless space, and overcome the optical borders. Aquarium layouts that were created according to these rules usually look much deeper than they actually are, and this spatial effect clearly gives an aquascape a certain magical quality. In order to create a sense of great depth in a layout you will basically need to follow just three simple rules:
- Strongly increase the substrate thickness
- Place large objects in the front and small objects in the back
- Divide the layout in layers during the planning phase
Adhering to only three basic rules sounds very simple, however, the importance of following through with them to the last detail and the causal relationship between these rules are often underestimated by many aquascapers.
First basic rule: strongly increase the substrate thickness
Especially beginning aquascapers do not realise the importance of a strongly rising substrate for creating a sense of spatial depth. Why is that so important? Let's keep the explanation simple: You want to make the entire basis of the aquarium visible. If your substrate is evenly spread and you look at this layout from the front you won't be able to see a three-dimensional picture, as your eyes will only see the frontal layer.
We have prepared a photo series illustrating this phenomenon:
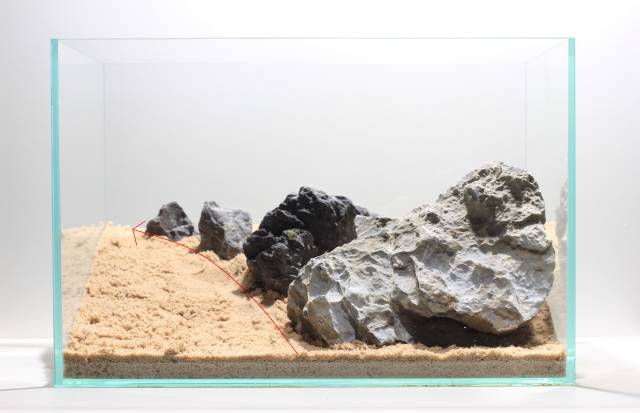
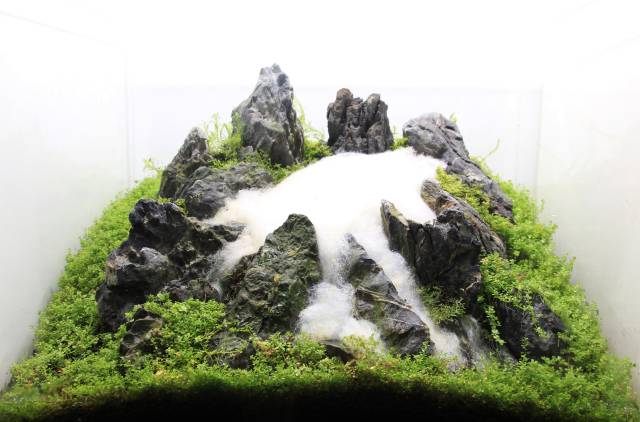
In this layout, there is a piece of decoration in the right corner in the back. In this case, a small grey piece of rock.
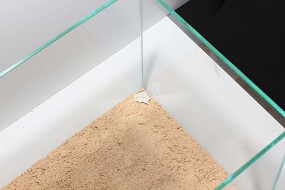
When you look at the aquarium from the front the small rock is difficult to see as you can only see the substrate in the front really well.
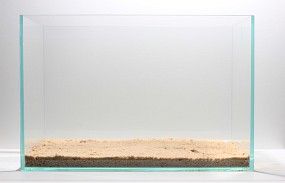
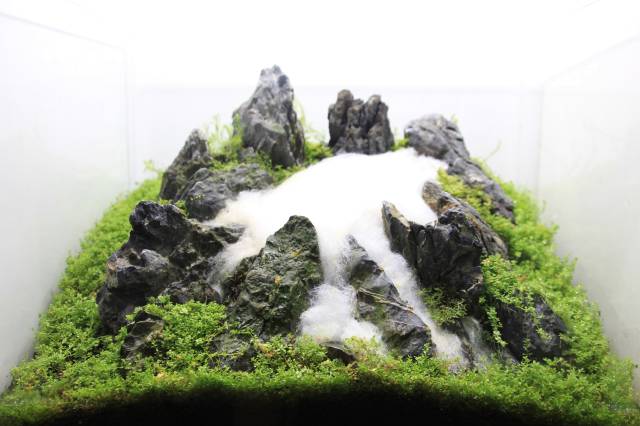
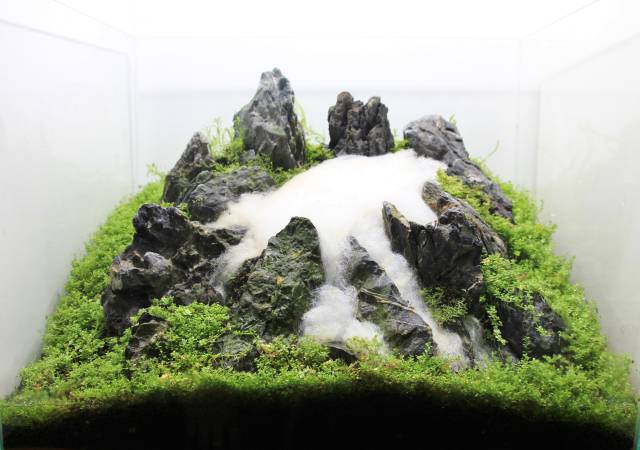
If you mound the substrate rising steeply towards the back you can see the piece of rock in the right corner at the back much better. Not only the piece of rock, though, you can basically see every grain of sand on the entire substrate surface.

How to stabilise the substrate
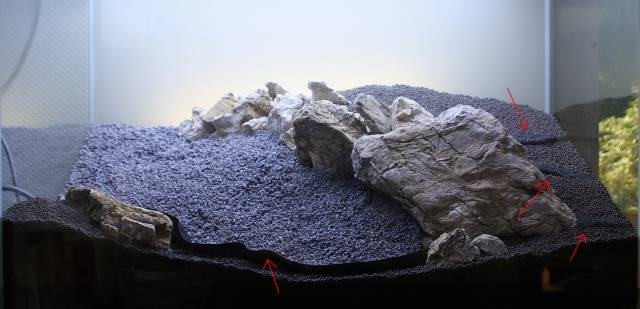
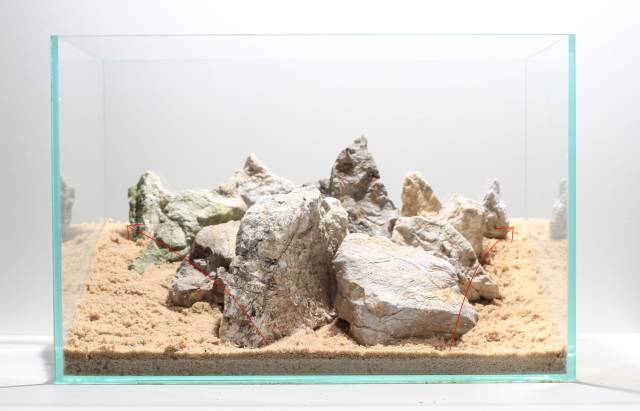
Mounding the substrate and having it rise towards the back certainly has its optical advantages, however, there are disadvantages to this method, too, and you'll need to keep certain things in mind if you want to preserve the steep slant in the substrate over a longer time. Natural erosion and the activities of shrimp and other bottom-dwellers like e.g. armored catfish will cause the substrate to level out over time. Unplanted areas are especially strongly affected by this phenomenon. It makes a lot of sense to rearrange the substrate slant once a week using a sand flattener. When large sloping areas are planted with low-growing ground-covering plants, the roots of the plants will stabilise the substrate once the plants have grown in and start to fill the free spaces. Make sure you don't have any digging fish or inverts (or just a very low number of them) in the tank during the first weeks until the plants have taken root and grow densely enough to keep the substrate where it belongs. In addition, strips cut from PET foil or pond foil (marked by the red arrows in the photo below) can lend additional support to the substrate. Later on you can remove these strips when the plants have taken over, or you can just leave them in place and have the plants grow over them.
When you work with decorative materials like driftwood or rocks you can use those as a natural substrate support. Fill small gaps between the hardscape elements with plants, mosses or small pieces of broken rock so the substrate does not trickle away through them.
Second basic rule: Place large objects in the front and small objects in the back
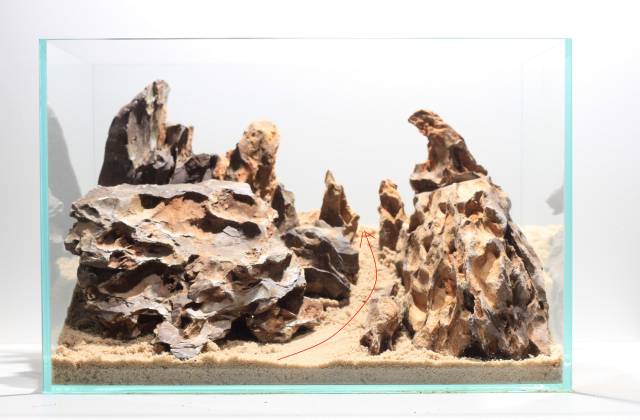
This aquarium layouting method makes use of a very simple optical illusion. Basically you can say that large objects appear to be closer and small objects suggest a greater distance. If you place the largest objects in the foreground and continue into the background choosing objects of a constantly decreasing size the sense of depth you create is extremely strong, of course always in combination with the first basic rule of mounding the substrate. The smallest objects farthest in the background need to be placed very high and highly visible so the onlooker can still see them well.
This principle can be applied to every optical parameter in a layout: the size and volume of decorative materials like rocks or driftwood, the leaf size of aquatic plants, substrate grains and even the deft positioning of fish of different size when you take the final photo shoot of your layout.
This principle is most effective when applied to the focussing areas of an aquarium layout. To make use of this concept you ought to familiarise yourself with the three basic layout forms of aquascaping to know where these points are. Here's a short overview:
- Triangular layout: The vanishing point lies at the basis of the triangle in the back
- Central layout: The vanishing points are located on the right and on the left, off center
- U-shaped layout: The vanishing point lies in the centre, at the end of the valley
Especially at the vanishing points it is recommendable to use objects that constantly decrease in size towards the back. Thus you accentuate the optical vanishing lines and create an impressive three-dimensional effect.
Third basic rule: Divide the layout in layers
Basically you create an aquarium layout in three layers, especially when it comes to planting: Foreground, midground and background. This is a classic approach traditionally used in Nature Aquaria and Dutch tanks. If you only consider these layers you will not get much of a sense of depth, though. The more layers you create, the more pronounced your three-dimensional effect will be. For this reason, we try to divide our layouts into more layers in order to get more depth, as we have explained in the first basic rule (substrate mounding), however, not with the substrate alone but with all decorative elements in the tank: we try to fill the entire aquarium with plants and hardscape, to make not only each and every substrate grain on the surface visible but also every piece of rock, driftwood and every plant, to thus give the layout a powerful three-dimensional appearance. The substrate, already mounded and rising towards the back, helps us with this task. The plants and decorative materials that are placed farther back are automatically in a higher, better visible place, which makes the differentiation between the layers farther from the front quite easy.
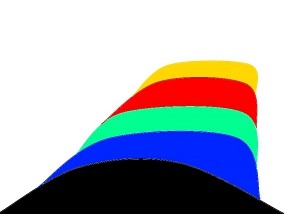
The layers are visualised as they follow one another, rising towards the back.
By creating many layers we can give a layout a powerful sense of depth. The layers further towards the back must not be covered entirely by those lying in front of them. Each layer needs to be at last partially visible to the onlooker, i. e. the layers in the rear need to exceed those farther towards the front in height. When you insert more layers those also need to protrude above those that are in front but remain smaller than those behind them. Theoretically, this effect can be continued infinitely, however, sooner or later you will run into a physical border: the back pane of your tank. The space in an aquarium is limited, after all, and for this reason it needs to be used as efficiently as possible.
In the following you can see photos we have taken of a freshly planted tank to visualize the effect of different layers.
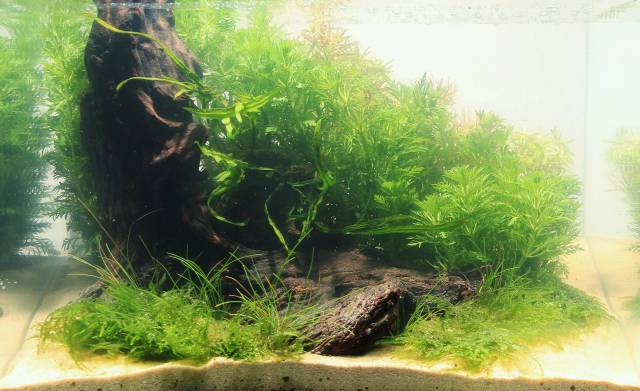
In the first photo you can see the classic division into foreground, midground and background. In the foreground, moss carpets have been planted, in the midground we have a piece of driftwood, and in the background there is a group of stem plants consisting of Limnophila sessiliflora. These three layers do not create a very strong sense of depth, the layout looks more or less two-dimensional.

Now we insert more optical layers. Between the moss carpets and the piece of driftwood we have planted some Eleocharis parvula, which protrudes above the moss but does not cover the wood entirely. We have attached some trident Java fern to the piece of driftwood, leaving the front part of the wood unplanted, to create a softer transition to the group of stem plants in the background. Behind the group of Limnophila sessiliflora we use a plant species with finer leaves and another colour (Rotala wallichii), whose shoot tips exceed the stem plant group in front of it in height.
With these simple measures we have doubled the number of layers and created a greater sense of depth in this layout. The transition between the plant groups and decoration are softer and thus more pleasing to the eye. When creating various layers of plant groups, please keep in mind to always maintain their form. A bush of plants should never be allowed to grow so high that it hides the plant group or piece of decoration behind it, i.e. the next layer, entirely. Even a group of the same plants adds to a sense of three-dimensionality if you trim its front shorter than its back. This method allows you to see all the plants that form this bush and not just the ones in the front — the same principle you follow when mounding the substrate towards the back.
Further hints and tips: Photographing and background light
As we have already mentioned — space in an aquarium is not endless, with the back glass limiting the view primarily. To widen this space optically you can make use of the room behind the aquarium to create a greater sense of depth. Many aquascapers use a translucent frosted backdrop and light the aquarium from behind with a background light. Visually, the milky white backdrop adds another layer, the layout does not end with the very last plant group in the background of the tank. This little trick increases the number of optical layers by another one. You can also create this effect with a backdrop of any other color, for example black or blue. However, the translucent frosted foil that is lit from behind creates an especially great sense of depth as the diffused light in the background makes the backdrop look slightly unreal and indistinct. With this simple optical trick you combine the clear, focused image of the planted layout with a blurry background, and thus create a greater sense of depth as blurry, unclear lines look farther away to our eyes, whereas clear, focussed lines always look as if they were all at the same distance from the viewer. You can even make use of this effect when taking a photo of your tank. For doing so, work with the aperture of your camera, the f-stop. A lower f-stop number means that the background gets blurrier.
In the following there are two explanatory photos of an aquarium landscape.
An f-stop of 8 as camera setting: the photo is more or less focussed in all places.
Here we have an 3.5 f-stop. The foreground is in focus, and the background is somewhat fuzzier. This effect clearly creates a higher sense of depth as the background seems to be more remote.
The lens you choose for shooting the photo of your tank, or rather, the focal length of the camera can also have a significant effect. Landscape-like aquarium layouts like our exemplary aquascape are given a more pronounced three-dimensional appearance if you work with a smaller focal length. This is often simply called a wide angle shot.
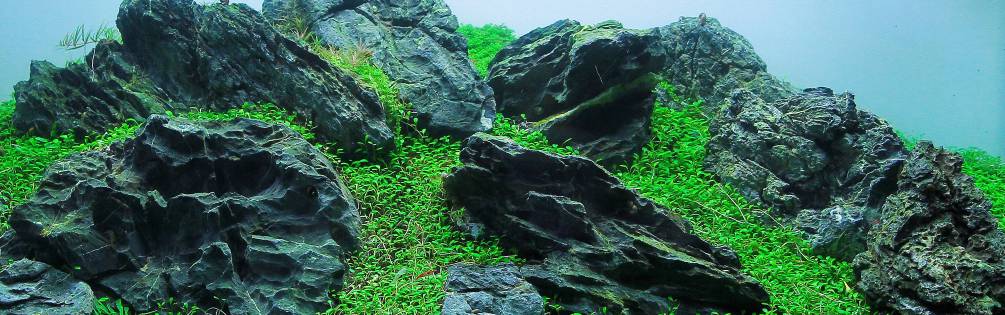
For comparison: Here you can see our exemplary aquascape photographed with a fixed focal length of 50 mm. The respective lens has a relatively neutral image performance.

Here you can see the same aquascape photographed with another lens. Its focal length of 18 mm is already a wide-angle format.
Please note the much more pronounced three-dimensional effect the bending lines of the planted areas on the left and the right give us. These bends make the optical lines look much longer and bring a greater sense of depth to the aquarium. Unfortunately, wide-angle photos also have one great disadvantage: the aquarium glass itself looks distinctly bent. You'll need to find a good compromise between a good three-dimensional effect and the degree of bending in straight lines. With these photographical tricks you can add an even greater sense of depth when you take the final shot of your tank and make it appear much deeper than it actually is.
Conclusion
The combination of correctly used plants and decorative materials with a pronounced increase in substrate thickness towards the back, the creation of layers and the right photographic technique and lighting will enable you to turn an ordinary aquarium into a three-dimensional work of art.