 Refillable CO2 injection system
Carbon is one of the most important nutrients for aquatic plants. Therefore, a CO2 injection system is highly recommendable for planted tanks or aquascapes. Pressurised systems using refillable cylinders are most efficient. In the following, we'll explain a standard CO2 injection system.
CO2 cylinder and pressure reducer
These CO2 systems typically use refillable pressurised cylinders that can easily be used again. Standard sizes in the trade contain 500 g or 2 kg of liquid CO2. To monitor the cylinder and to regulate the amount of CO2 that is given off, you need a so-called pressure reducer.
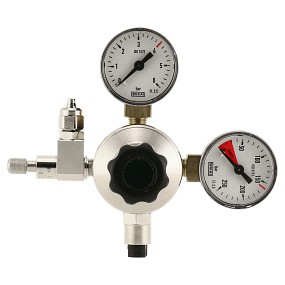
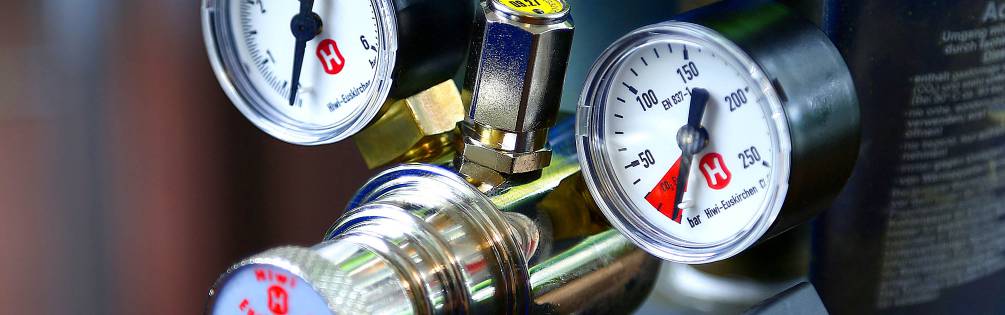
This pressure reducer ideally has two displays (aka pressure gauge), which show the working pressure and the pressure inside the cylinder in bar. Whereas the cylinder pressure gauge shows the filling level of the cylinder, the working pressure gauge informs us with how many bar the CO2 gas is added to the aquarium. In this context it is important to know that some CO2 dispensers need a minimum working pressure to function correctly. You can adjust the working pressure (usually with a large turnable knob, which is mounted on the pressure reducer), and you should do so — adjust the working pressure to a value that allows your CO2 dispenser to function properly.
Needle valve
For fine-tuning the CO2 supply, the pressure reducer is equipped with a so-called needle valve.
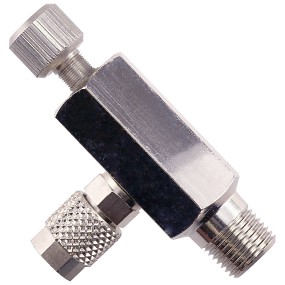
The needle valve is equipped with a small adjusting knob and a connection for the CO2 tube. With this tube, our CO2 injection system is connected with the CO2 dispenser inside the aquarium.
Night shut-off
In this tube connection, you can interpose some useful gadgets and safety devices. Directly behind the needle valve, a so-called night shut-off can be integrated.
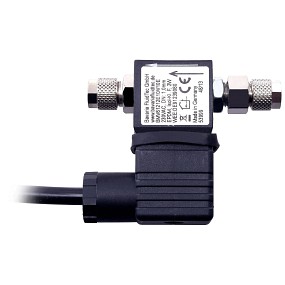
This night shut-off is based on a solenoid valve, which can be switched on and off electrically. If you connect this solenoid valve to a clock timer (for example the one that controls the light of the tank), CO2 is only supplied during a certain length of time, for example only when the lights above the tank are on. This makes a lot of sense as plants do not use CO2 in the dark. Supplying the tank with CO2 during the night is thus not only superfluous but unnecessary costly.
Please note: When you connect the solenoid valve with the pressure reducer, make sure you do not use soft silicone tubing for this purpose but pressure-resistant CO2 tubing without exemption.
Check valve
After all the technical components like the cylinder and the pressure reducer and the solenoid valve, you ought to install a check valve in the tubing.
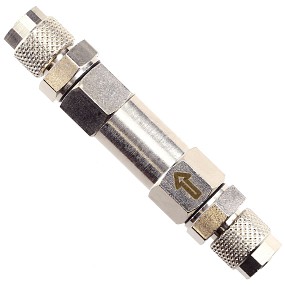
A check valve will protect your entire CO2 system from aquarium water that may possibly enter the tubing. When installing the valve, please make sure you pay attention to the gas flow direction. The arrow on the check valve needs to point away from the CO2 system, and towards the CO2 dispenser zeigen.
Bubble counter
In order to finely adjust your needle valve correctly you need a correspondingly sensitive measuring device that helps you monitor your CO2 supply. This is usually done by a bubble counter, which is installed after the check valve (usually after a longer piece of tubing, as the bubble counter is quite often attached to the aquarium glass, whereas the rest of the CO2 equipment is hidden in the aquarium cabinet).
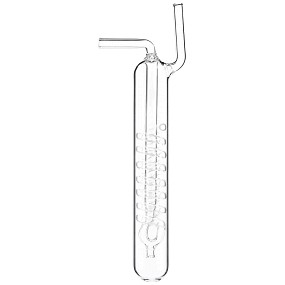
If you count the number of CO2 bubbles that are given off during a certain period of time (for example per second or per minute), you will get a relevant value you can base your CO2 control on. Usually this value is given as bps (bubbles per second) or bpm (bubbles per minute).
Important – please note: If you adjust the amount of CO2 you supply on the system (e.g. on the needle valve), the entire system needs a little time until the correct number of bubbles is shown in the bubble counter. After an adjustment, please check the number of bubbles again after some hours to make sure everything works as it should.
CO2 dispensers
Finally, we have our CO2 dispenser at the end of our tubing. Quite often, CO2 is dispensed with a diffuser, which atomises the CO2 into especially tiny bubbles.

The diffuser is installed inside the aquarium, preferrably in a place with a high current. As an alternative, you can use a so-called inline atomizer. These are not visible inside the aquarium, as they are integrated into the external filter hosing.
Permanent test
Indispensable for measuring the amount of dissolved CO2 in the aquarium water: the permanent test made of glass. It is independent of the rest of the CO2 injection system, and it is best placed somewhere inside the tank where you can see it well.
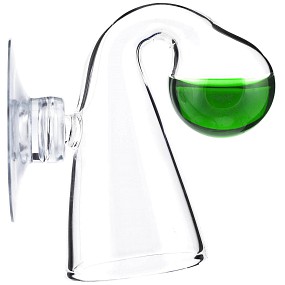
The test agent contained in the permanent test changes its color and thus indicates whether the amount of CO2 dissolved in the aquarium water is too low, correct or too high.
Please note: The test agent needs some time to react with the CO2 in the water; it shows the correct results after a few hours. When you adjust the amount of CO2 supplied to your tank, please check the color of the indicator inside permanent test again after a few hours to make sure everything works as it should.
A short overview of all components in a logical order, starting at the cylinder and ending inside the aquarium:
CO2 cylinder-->pressure reducer-->night shutoff-->check valve-->bubble counter-->CO2 dispenser
Independent of this line: permanent CO2 test